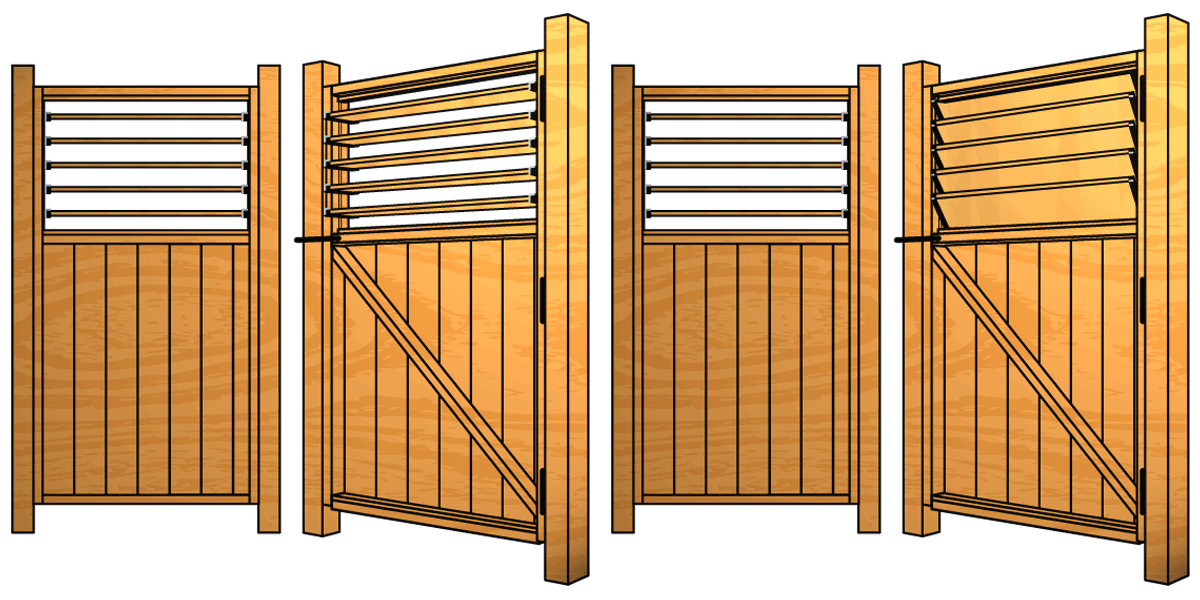
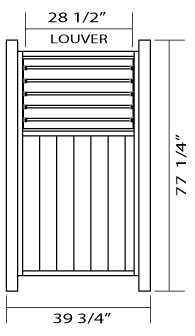
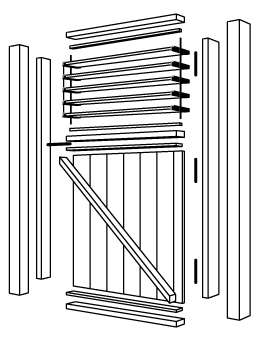
This plan will show you how to build a full size louvered gate. Use as a guideline and modify for your own purposes. And don’t forget to read Howie’s Tips at the bottom of the page. You’ll love em!

Dimensions
FLEXfence full sized louvered gate


Note
The drawings are to be used as a guide only.
MATERIAL LISTING
- 1/kit FLEXfence Louver System
- cut track into 2 sections measuring 22″ each. (leave 3 ” from 1st pre-punched hole)
- 2/pcs. – 4″ x 4″ x 4′
- 10/pcs. – 1″ x 6″ x 31¾”
- 6/pcs. – 1″ x 6″ x 24 ¾”
- 2/pcs. – 1″ x 4″ x 36″
- 2/pcs. – 2″ x 4″ x 33″
- 2/pcs. – 2″ x 4″ x 69″
- 1″ finishing nails
- Exterior grade carpenter’s glue
TOOLS REQUIRED
- Pencil
- Measuring Tape
- #1 Robertson Screw Driver-Green Handle or (Philips Screw Driver)
- #2 Robertson Screw Drive-Red Handle (Philips Screw Driver)
- Hand Saw
- Hammer
- Chisel
- Combination Square
- Protective Eyewear
- Level
OPTIONAL TOOLS
- Drill with appropriate bits & counter sink bit
- Router with decorative bits
- Power saws – Mitre & Skill
HOWIE’S TIPS
- When attaching the FLEXfence brackets onto the rails allow for the brackets to move freely (swivel). Do not over tighten!
- When sizing FLEXfence always cut the rails and operating bar with hand tools and never with power tools.
- Always wear protective goggles.
