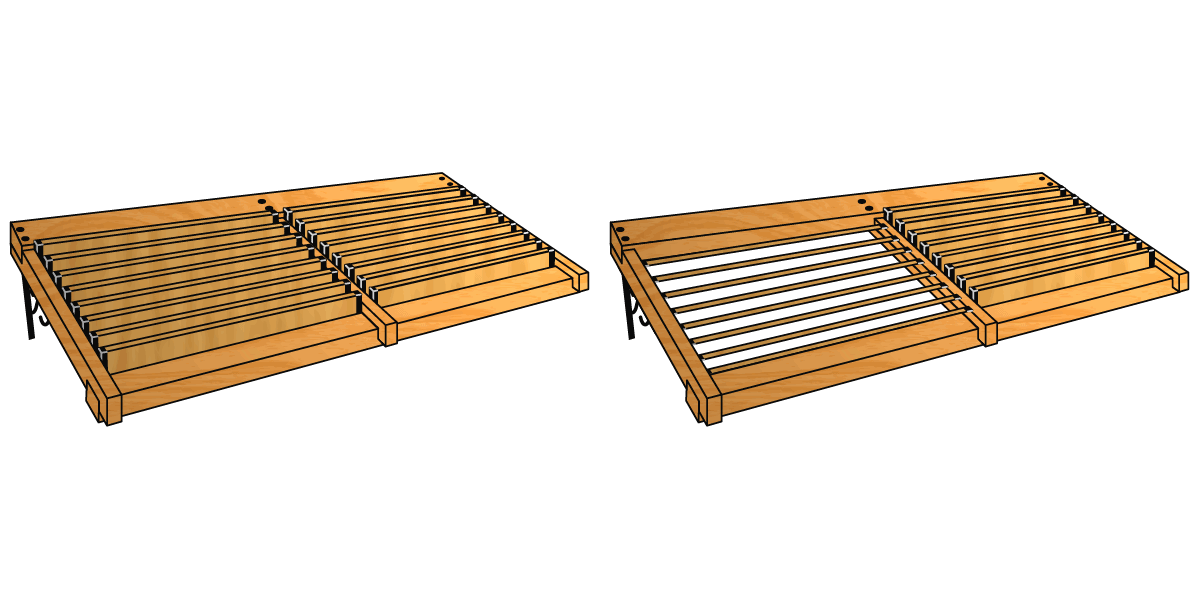
We are getting more requests for this plan on how to build a louvered awning over a patio door. It’s a great alternative to other types of awnings out there.

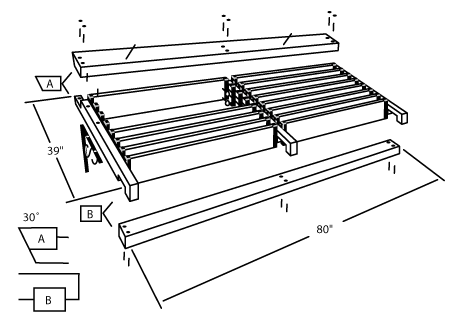
Dimensions
FLEXfence louvered patio door awning

Note
The drawings are to be used as a guide only.
MATERIAL LISTING
- 2/kits FLEXfence
- 2/pcs. – 2″ x 4″ x 80″ OR – 2″ x 3″ x 80″
- 3/pcs. – 2″ x 4″ x 36″ OR – 2″ x 3″ x 36″
- 16/pcs. – 1″ x 6″ x 341/4″
- 2/ FLEX·Awning Brackets (could substitute with your own wood brackets)
- 4/pcs. – 5/16th x 4″ carriage bolts with appropriate nuts and washers
- 4/pcs. – ¼” x 3″ expansion anchors (depending on wall construction)
- 12/pcs. – #8 – 2″ wood screws
- 12/pcs. – wood plugs (optional)
- 4/pcs. – 3/16th x 1 ¾” machine eyebolts with appropriate nuts, washers and t-nuts
- Carpenter’s glue
- Sandpaper
- Decorating: stain or paint
TOOLS REQUIRED
- Pencil
- Measuring Tape
- #1 Robertson Screw Driver-Green Handle or (Philips Screw Driver)
- #2 Robertson Screw Drive-Red Handle (Philips Screw Driver)
- Hand Saw
- Drill with appropriate bits & counter sink bit
- Hammer
- Chisel
- Combination Square
- Protective Eyewear
- Level
OPTIONAL TOOLS
- Router with decorative bits
- Power saws – Mitre & Skill or table saw
HOWIE’S TIPS
- When attaching the FLEXfence brackets onto the rails allow for the brackets to move freely (swivel). Do not over tighten!
- When sizing FLEXfence always cut the rails and operating bar with hand tools and never with power tools.
- Always wear protective goggles.
